Monday, June 18, 2012

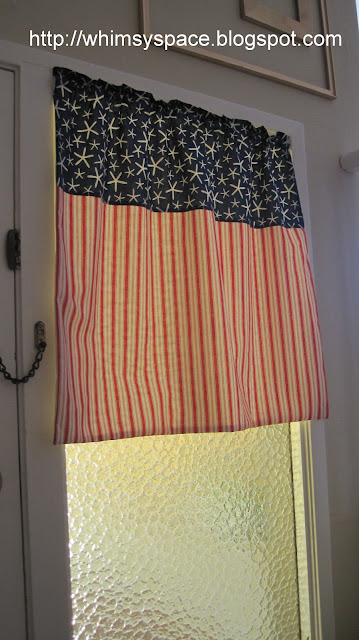
Holiday Curtain -Flag

This year I have been making theme curtains for my entryway.  I found come cute starfish fabric on Fabric.com and I felt inspired to make a flag curtain.
 Since we live on the coast, I thought it was cute, I love the red stripes too!
I think I am going to make one for my front lawn too!
This week I am linking to:


Sunday, June 17, 2012

Save the Tissue Paper!

Did you know you can save your tissue paper by ironing it?  I hate buying tissue paper and it seems so wasteful that it is used once or totally wrinkled when reused.  Since I have so many birthdays from May to June, I had some paper and I thought-I iron my patterns why not iron this and it worked great!
 I went from this....

 To this...
I used a wool setting on my iron and ironed it as I would fabric.

Saturday, June 16, 2012

Crayon Art

My son has an aide at school and I wanted to show how much we appreciated all her work this year, so I made this crayon art piece for her.


I love this end result, however, I actually had a different idea in mind when I started...

 This was my original inspiration, I found this picture on Pinterest.  How I ended up all melted was that I started using our old crayons as a test to see how I could break them and line them up and I knew I wanted a heart and not an initial, but then when I saw all my tester crayons lined up  I thought it would be cool to melt them and ta da!

I had a hard time giving this piece up, if I had any wall space left in my house I would make one for myself!  The best thing was-it only cost me the price of the frame, which was 60% off at JoAnn's, so I got this frame for $5!!
This week I am linking to :
Funky Junk Interiors
I'm a Fan of My 1929 Charmer Blog!


Friday, June 15, 2012

Teacher Thank You Gift

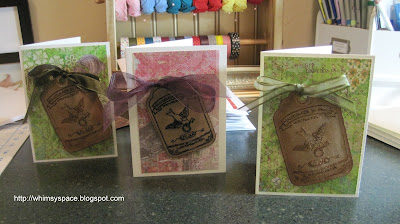
I know all the blogs have moved on from teacher appreciation gifts, but TODAY is our first day of summer, so here is my post for our thank you gift for our amazing teachers this year.  I decided on handmade cards, because everyone can use them and I had most of the supplies.  I waited until I had the 50% off coupon for Michaels and then I got the black cards, so this gift cost me very little, but I think they turned out great.
 I started with my thank you card for the teacher, I embroidered this on material and the scallop matched the card perfectly.

 Since I had two teachers I made some cards similar.  These were embroidered on paper.
 I used washi tape for simple birthday and thanks cards.  The miso cute is embroidered.
 These were rubber stamped.

 These were just stickers, but I cut out the tree branches to add to it.

 I loved these cards, this was a pack that signified the field trips the kids took and the activities they did this year.  We live on the coast so that was the beach one, it is stamped with fabric, the Cinco de Mayo was fabric, but I went over the designs with my sewing machine to make them stand out and then I added a border with variegated thread.  The school bus is made from embroidered felt and the map has China Town, which was our last field trip.


 A little more detail here.
 This was just layered paper and stickers, but I really like how it turned out.
 These are some of my favorites, the bird and love are embroidered on paper bags.


 Close up of the beach one.

  These are my favorite and I had to make one for my friend too because I liked it so much!

I made a gift bag for them, of course I forgot to get a picture of that, but this was the material.
There were 20 cards for each teacher in all.
Monday, June 11, 2012

Ribbon Organization

So now that my ribbon cabinet is finished, I decided to go through all of my scraps of ribbon and clean them up.  I am tired of trying to find a small scrap, dig through my pile only to find it is all crumpled and messed up from being squished in a box for years.  So, I went through my wood stuff and found those little people spools and decided they would work.
I went from this....


To this....


 Ahh... so much better!

Linking to:


Friday, June 8, 2012

Ribbon Holder Cabinet

Lately I've been making a bunch of things for other people, so for this project I wanted something that would be just for me!  Recently my ribbon collection had been getting a bit out of hand and I needed a new ribbon holder, so I went to my pile of wood and came up with this new ribbon holder.  I am really excited by it and I enjoyed the process of making it so much that I didn't take a lot of pictures of the process, but in total this project cost about $9.
Here's how I did it...
I started with a plain wood base from Michaels because I liked the how the it had been routed. 
I used the table saw and cut it in half lengthwise to serve as the top and bottom of the cabinet.
Then I cut some plain 1/4" plywood about 5" wide by 27" high.  I used some of my left over bead board from my kitchen project as the backing.  I also had some corner pieces that I added to the front to clean up the rough ends and I added a little strip of decorative molding to back to clean up those ends.  Then I went  a little crazy with the molding.  I had a bunch of left over molding from a trip to SCRAP for my picture frame project.
After I had the box complete, I then drilled holed in the sides and inserted dowels for the ribbon.  I am still working down my incredible stock of gold spray paint, so I painted everything gold.

  Here is the molding, I used two different types and they blended beautifully.

I also added a hacksaw blade at the bottom of the molding to cut the Washi Tape, but I put it horizontally and I wish I had placed it vertically to work better.
 I love how the height matched up perfectly to the window sill-that doesn't always happen for me!!
I might add end caps to my dowels, but I wanted to do this on the cheap and including the caps would have added another $6 to my project.
I am so happy with how it turned out, it really gives my art room a little panache!
Linking to:
Funky Junk Interiors

Photobucket
I'm a Fan of My 1929 Charmer Blog!